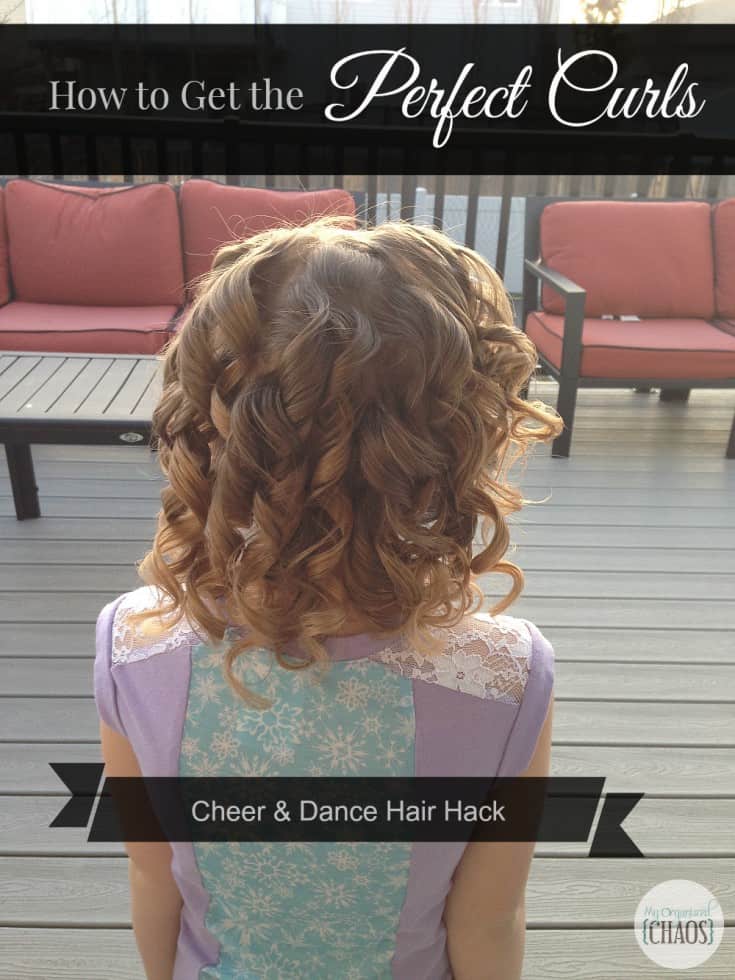
How to Get the Perfect Curls – Cheer and Dance Hair Hack
How to Get the Perfect Curls? Especially for Cheer and Dance? Here’s a fantastic Hair Hack, using a hassle-free and no-friss curl formers for ringlet curls.
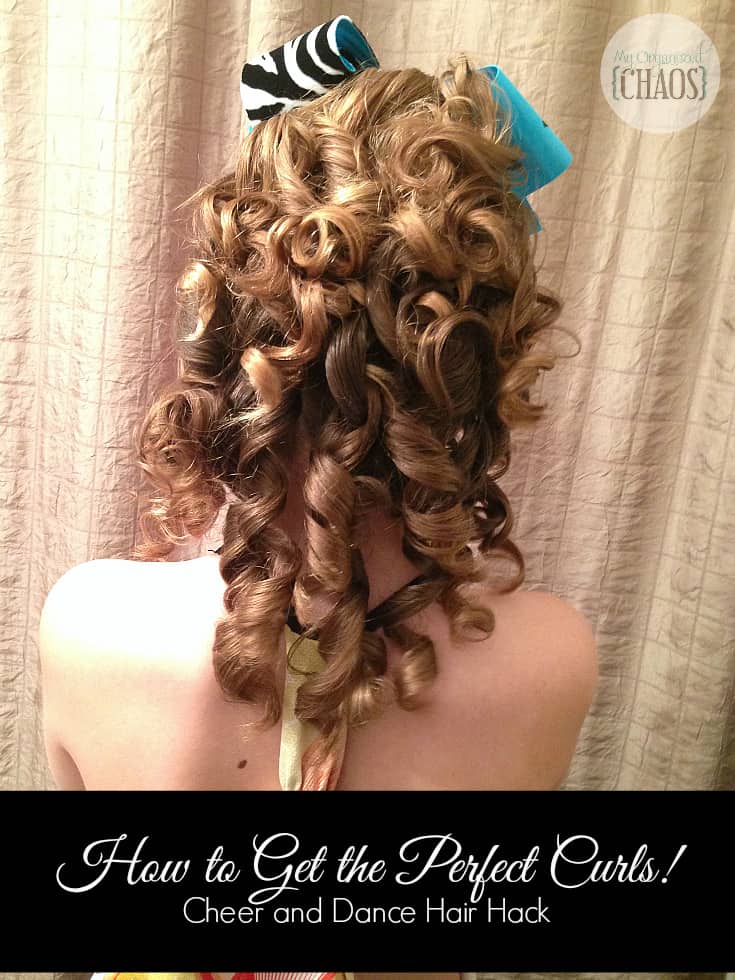
How to Get the Perfect Curls – Cheer and Dance Hair Hack
I’ve most likely spent a small fortune on curling irons and curlers in my lifetime. Even … perms. Yes, I said perms.
While each one I tried had its benefits, I was never a hardcore fangirl of any of them. Each method I tried lost their lustre – either the curl didn’t last with one kind, or another was too uncomfortable, and still another took to long to set. Needless to say, I accumulated a cabinet full of curl styling tools and ever make of curler on the market.
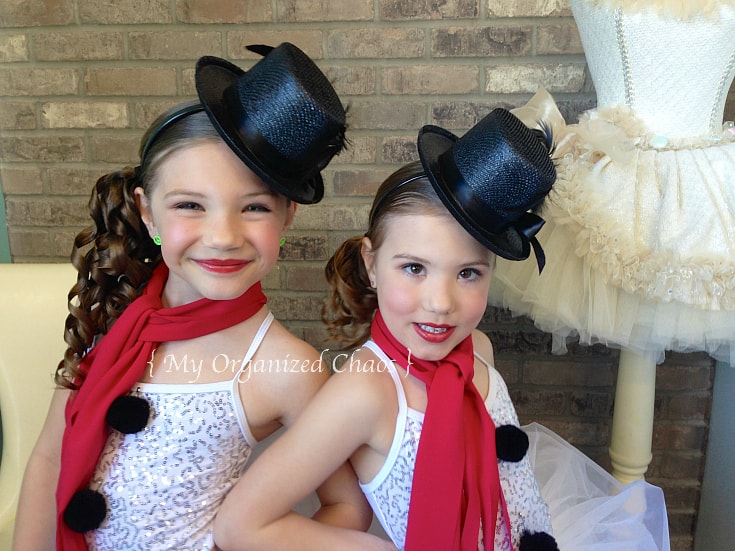
Yet between my hair and my three daughters, who need ringlet curls for cheer and dance, I desperately needed to find the secret to getting the perfect curls each time, with as little hassle and fuss as possible.
Then, I discovered Curlformers and immediately the product caught my interest. Yet the cost made me weary and I didn’t want to fork over a lot of money for yet another possible fail to fill the cabinet of rejects. Yet, after looking into this type of curler, I knew it was one I had to try – so, I searched online for a knock-off Curlformer version that was a more attractive price. And found one.
I bought these heatless curlformer-like curlers off Amazon, and I honestly believe it was one of the best purchases of my life.
**For full disclosure {cause I’m ‘crazy’ like that here on the blog}, this is not a sponsored post yet there are affiliate links. I made my own purchases and am not affiliated in any way with this seller or product. I even went back for more because I was impressed with the product, the seller and the ship-time.
Since trying these curl former curlers for the first time, I fell in love, like I had no other curler or styler. So of course, being in the public eye as much as I am, I shared photos and mentions about finding the perfect curler for my daughters hair. I call it the ultimate in cheer and dance hair hack.
Of course MANY started inquiring about the Curlformers that I was using, so I thought I’d write a post on it. Plus, I’m so excited to share, these really are a game changer!
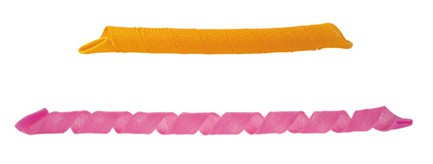
Curl Formers curlers work by using sheaths and a plastic hook and the process is so simple.
WHAT TO PURCHASE:
Choose the sheath package that is a bit longer than your own hair – most will use the pink and orange ones. The difference between the pink and the orange is the direction of the curl, one curls right and the other left, so you want to do a random mix of both colours on one head of hair.
I did purchase the shorter curl former sheaths {mine are blue and green}, intended for Katie since she has shorter hair. Yet, I found these to be too short for even her {they are really short!}, and while I do use them on her hair when it’s in a ponytail, I’d still recommend having the longer ones one hand, just to be sure. After all, you can have longer sheaths and it not even matter – but if they are too short, you’ll have hair sticking out the ends of the sheath which won’t curl. So if they are too short, you won’t want to use them.
There are other colours as well, yet just note that each colour offered is a different length and some a tighter/looser curl. The pink/orange are the most popular and I find them to work great on whichever type of curl I need. Again, rule of thumb – it’s ok to go longer but you don’t ever want shorter than your hair.
When buying for the first time, make sure to purchase a Curlformers Starter Pack or one with many curlers AND a hook. Then you can add to your stock as needed.

HOW TO USE:
I like to start with damp {not soaking} hair. I usually secure the top half of the hair to the scalp with a clip, and start with the bottom first, though you could work from top to bottom if you prefer.
When you gather a section of the hair to curl, don’t do too much hair at once or it won’t fold into the sheath. Plus, smaller pieces will dry father and you are left with smaller curls. Even if I want loose curls, I use small pieces since I’d loosen larger curls at the end anyway. So, I gather a small section of the hair. You could just use damp hair and it’ll work fine, yet I like to add a bit of mousse to each section as I find it helps to not have any frizz – even on hair that is really prone to frizz.

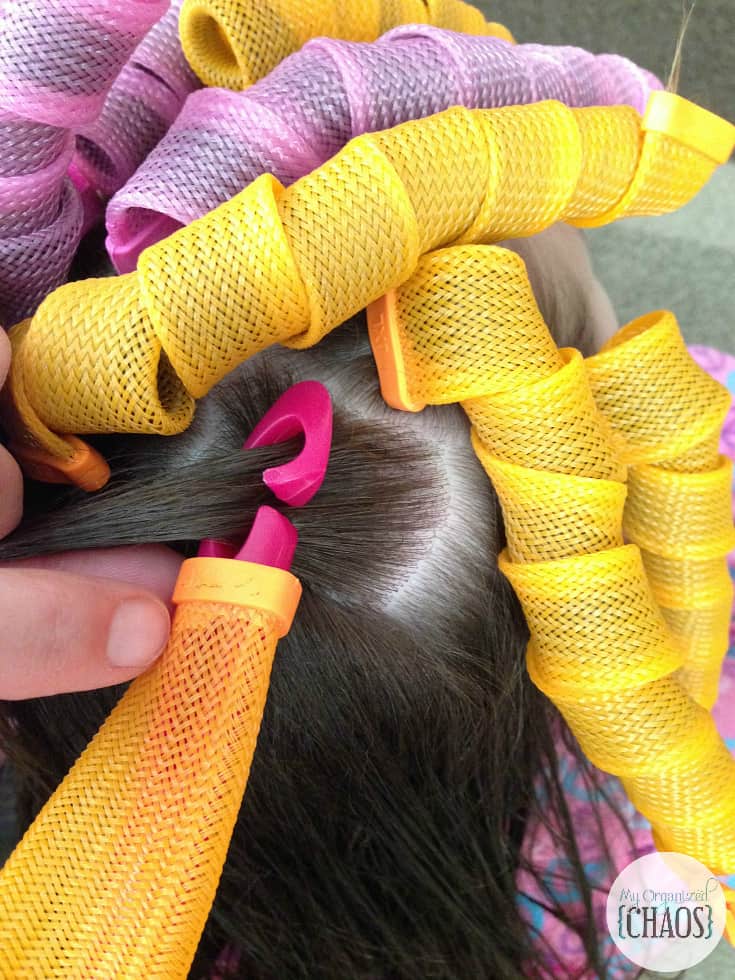
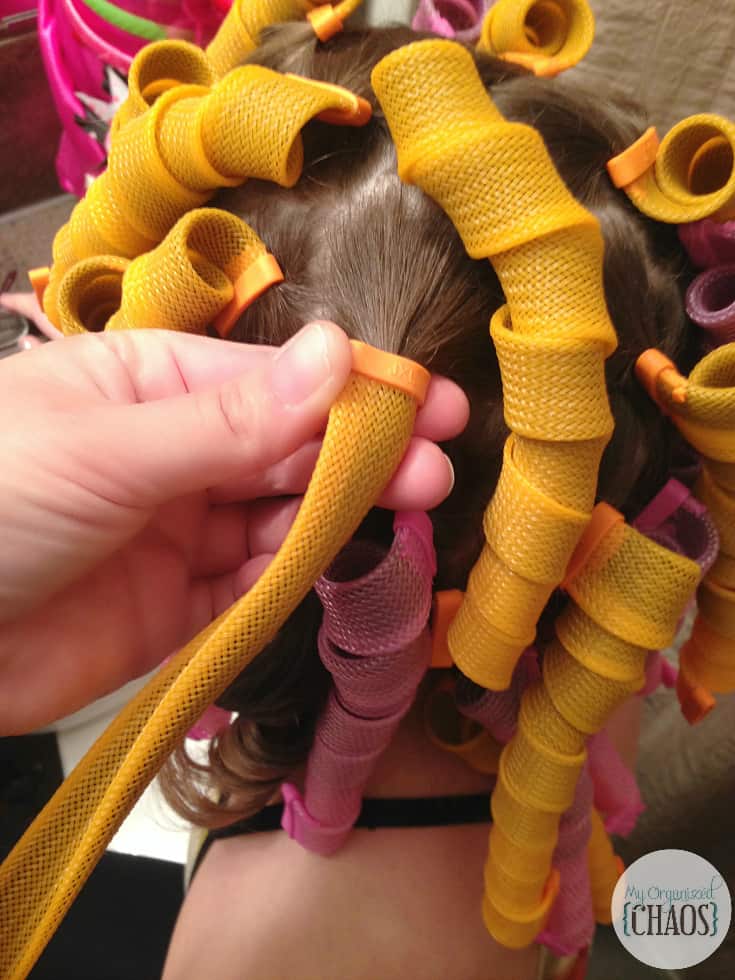
Push the plastic hook through one end of the sheath and out the other. Then, use the hooked end to hook onto the hair section, at the scalp.
Holding the sheath at the hooked end, pull the plastic hook through the sheath until it comes all the way out. It’ll pull the section of hair through into the sheath. Once the hook is all the way out, the sheath will fold into it’s usual curl shape and only when it does, do you let go of the base of the sheath.
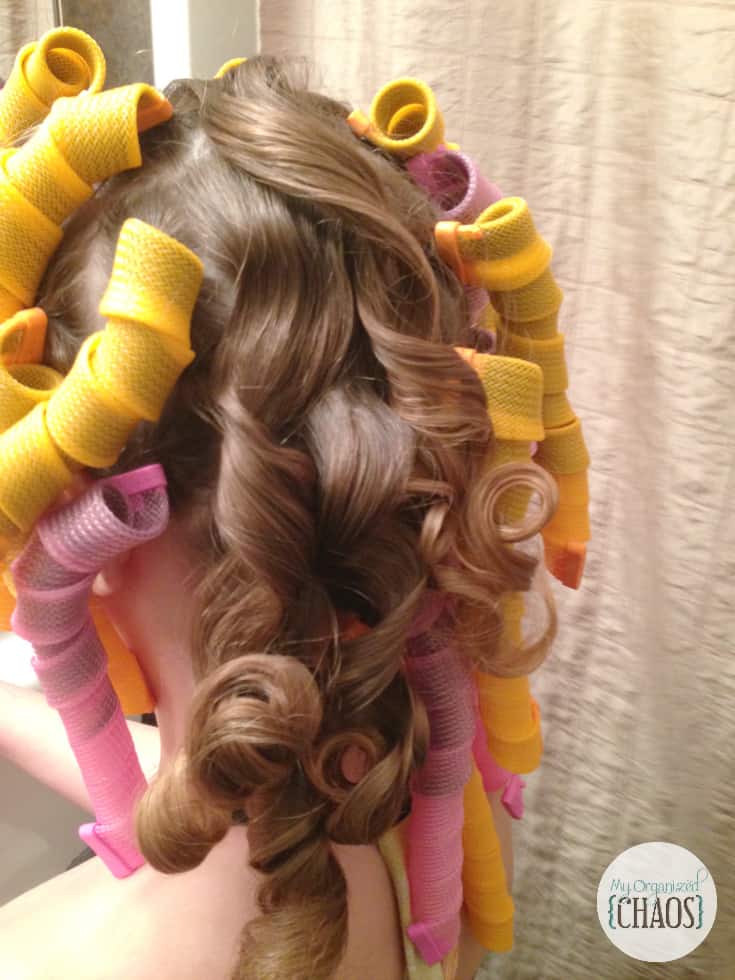
Repeat steps with each section of hair and work your way through the bottom section of the hair until done. Then, take sections out of the top half that you have secured to the scalp with a clip until all the hair is in sheaths.
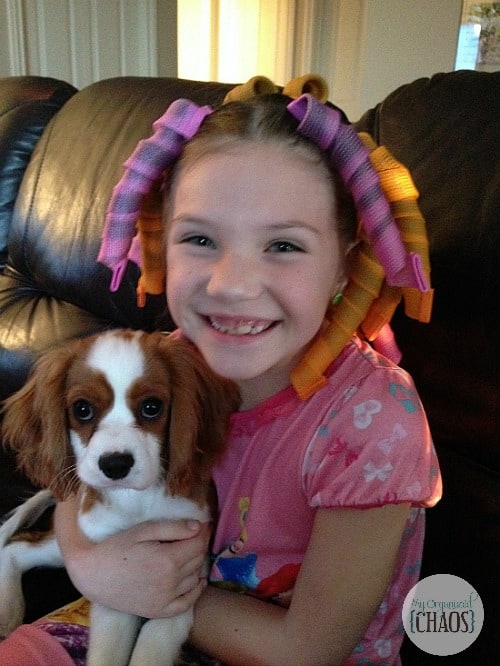
Sideshow Bob or adorable Lalaoopsy? You decide!
The steps above may sound a bit complicated, but I’m walking you through it step-by step. It’s really a simple process and it takes little time. I can put a complete head of hair into curl former curlers in about 10-15 minutes. You’ll find that rhythm and it’ll be a simple process – I promise!
HOW TO TAKE CURL FORMERS CURLERS OUT:
Hold the sheath end which is resting at the scalp with one hand. With the other hand, run your fingers along the sheath until it straighten out of its curl shape, starting at the scalp end and ending at the other. While both both hands are holding each end of the sheath, squeeze the scalp-end of the sheath until it opens from it’s closed position and slide the entire sheath so the hair comes out.
Why I love these curl formers curlers:
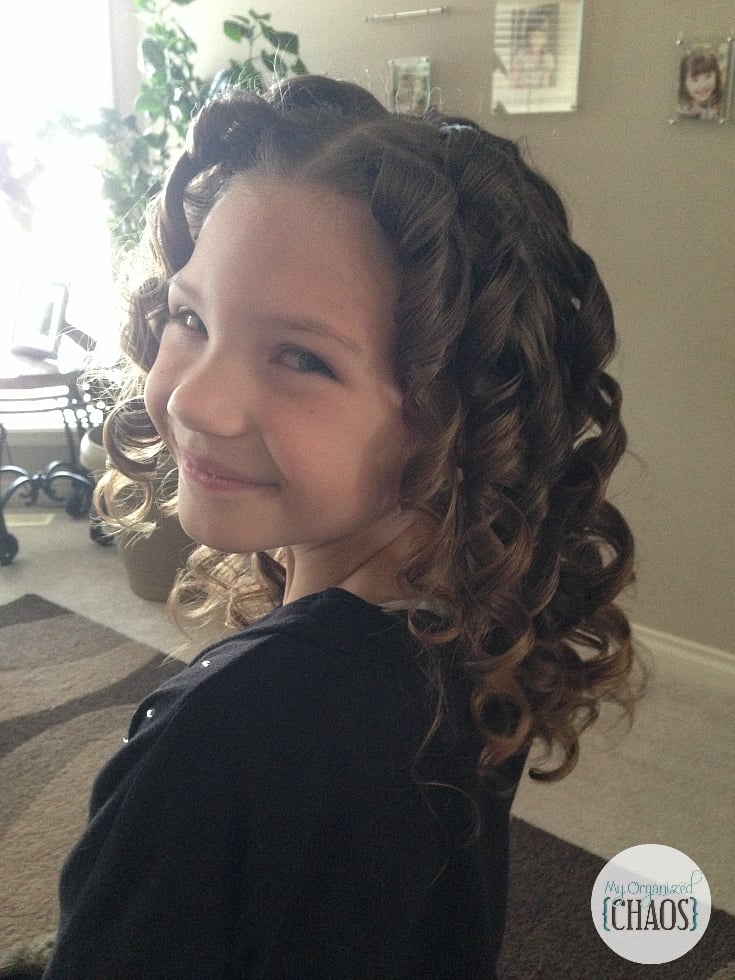
The curls that result are amazing, very pretty curls that you just can’t get with any other styler or curler. They are simple to put in and take out. My kids don’t complain about sleeping in them, which is a biggie.
Before when I curled my daughters hair for cheerleading, I’d use a curling iron on each section and it’s take me over an hour. Using these, it takes just minutes to set the curls the night before and when it comes time to take them out, even less time. It’s cut our ‘getting ready’ time in half!
When using for cheerleading – I put in her ponytail the night before, and curl the hair hanging at that time as well. then in the morning, I take out the curlers, slick down some stray hairs at the crown which resulted from sleeping, using a mouse or gel. The only thing I have to do now is some backcombing to get the pouf and height required and that’s it. Our cheer competition mornings are less stressed and a whole lot easier!
When I use these for my twins dance, they are required to have a side ponytail with hair curled. My one twin with longer hair, I put her curl formers in at night, using the same process I do for cheer.
My other twin has shorter locks, so I wasn’t sure her hair would stay in a decent side ponytail at night while sleeping. Her hair is thinner than my other daughters, and dries quicker than the average head of hair. So, I did her hair in the morning using dry hair with mousse combed through each section before pulling the sheaths through. The perfect curl set for her in just 1 hour! So fast!
So, keep in mind, you don’t have to sleep in these curlers, they ‘set’ much faster! Yet, for our early morning cheer competition departures, my kids usually sleep in them. Yet, it’s not necessary!
Check out our video on how these curlers work:
EXTRA TIPS: If you find your hair is tangling or getting stuck in the sheath when trying to pull the hook out – you have too much hair in your section so make smaller sections. As well, it’s easier to pull the hair through the sheath when holding it away from your head, versus right next to it and downward. If you’ll be sleeping in these, try and not have the end of the sheath resting against the head. Leaving a few centimetres of hair between the scalp and sheath will be more comfortable for sleeping in.
For the perfect no-hassle frizz-free curl that lasts all day, and is simple to use and dries fast – I love these curl formers curlers!!
My other curl styling tools and rollers have been donated and my cupboard is not stocked with many sets of these kind of curl former curlers. Finally, I’ve found the secret to long-lasting, beautiful curls.
I personally use the knock-off version and so far they’ve been great. Not sure how they compare to the patent-pending actual Curlformers {which are more money}, but would love to hear the difference if anyone has experience with them.
.
Disclosure: This is my own purchase and experience – yet there are affiliate links in the post.
.


These must be the best curlers I’ve ever seen, they do a fantastic job.
I love these tips! Beautiful curls! My mom used to put those hard rollers in my hair and I hated it!
My girls aren’t in dance but they love the curls. I always wondered how to get them. Great info
Amazing review and video!! I was hesitant about this product but you’ve convinced me otherwise, thanks!
I will have to let my friends know about these curlers for their kids.
These curlers are amazing and I can’t believe how easy it is to put them in and take them out. You’re really good at do it.
Wow, the curls turn out so nicely! What an interesting product, and certainly better than a hot wand for kid’s hair. I did spy a typo in the article, though – “Yet the cost made me weary..” (wary). Thank you for letting me know about these!
I sure could have used those for all the many years my oldest was in gymnastics and cheerleading.
These look so cool!! I might get for our girls for Christmas 🙂
These look so cool!! I will have to get for our girls 🙂
What an ingenious idea! When I think of all the uncomfortable nights sleeping in hard rollers as a child,sure wish this had been available then!
I’ve always wanted a bit of a curl in my hair but only have the slightest wave and of course in the wrong place! One of my daughters on the other hand has naturally curly hair and really hates it – guess we’re never satisfied with what nature gave us. These curlers work fantastically well and you have beautiful daughters 🙂
Omg how awesome!!! I wished I knew about these when my girls were young this would have been perfect, and there wouldn’t of been as many fights either!! your daughters hair looked so nice and anyone with long hair should have this!!
We love the look of the curls. We intend to purchase these curlers. Your daughters look so pretty . Katie’s hair looks just as bouncy and curly as her sister, even though her hair is much shorter. Your three daughters are truly beautiful young ladies.
Marion and Marilyn
These are lovely curls. I tried clicking on one of the links, but it was broken. If I do decide to get them though I’ll comeback and use your links because they look wonderful. I would have loved curls like that.
These sound great, will have to tell my friend about them because she is always trying to put ringlets into her daughters hair.
Wow, they sure do give nice curls! I’m a little apprehensive about how well I’d be able to pull off the whole process to get the curls correctly, but I’m almost willing to purchase and give it a try.
Awe the curls are so nice but the girls are beautiful
The curls are beautiful!
We use these for my dauhgter for cheer. They are so easy, if I can use them anyone can.
amazing
LOve this, I’m ordering some!
Holy cow! These things look amazing! What fabulous curls you got from them! I’ll have to look into these.
They are amazing!
Nice hair! You make it look so easy! I’ve tried various things and have had laughable results… maybe give this a try!
Well thanks but it IS easy! I promise! 😉
Those are some precious curls. Absolutely adorable and I love how easy (much easier than I imagined) they are to do
OMG, those curls are gorgeous! 🙂 I wonder if these will work in my hair that NEVER curls.
Absolutely! My one twin {with the longer hair, as seen in the photos} – her hair is so hard to curl. So, the results speak for themselves!
My youngest daughter was into pageants. For years we did the ‘gotta have big curl hair game’… Oh how this would have been such a life saver!
Oh I bet it would have!!!
I like how you don’t have to use heat! What a great way to keep from damaging your hair.
For sure! The backcombing for cheer does enough on it’s own – I don’t want to add to the damage!
How adorable! Her hair looks flawless.
Those are amazing. We sure have come a long way when I was cheering we put my hair in bobby pins. Always did a great job but no one is that old fashioned now and those look softer to sleep in.
My daughter has natural curls, so I do not have to worry about that! Now, on the other hand, straightening it is a different story!
Never been there! lol Hope you find just as easy of a solution!
This is fantastic! My niece and daughter will love this! I so need to get this for them!
Happy to help Allie!
These are awesome! I’m amazed by how perfect they turned. They look adorable.
Thanks Sarah, I love these curlers!
Oh my goodness, those are awesome curls. I need those for my little ones and their cheer competitions. Thanks for sharing.
Happy to have helped Shauna!
Those curls are awesome! This is really helpful. Curls can be difficult to do correctly.
They sure can!!
These are great! As a dancer I wish I’d had these as a kid- I endured hours under a hot curling iron!
OMG, me too 🙁
These make such nice curls. I love the ringlets. My daughter would love this.
You get really pretty curls with these, I love them!
This would have made doing my Daughters hair for Cheer so much easier. I love how simple they are to use.
🙂
Aww, your little girls hair styles are so cute! I love how perfect their curls did come out.
These have come a long, long way from tying hair in rags to get ringlets. I remember my Mother tying my sister’s hair in rags every night!
Ha! I remember those!!
Those curls look absolutely gorgeous! It is so much easier than how my Mom used to curl my hair in rags when I was a kid. I love these and I want to get some for my daughter.
It took forever, I remember that all too well!!!
Those are really cool. I’ve been lucky enough to have natural curl in my own hair but for those who have thin or limp hair, this is a great idea!
So jealous!!
These are awesome! I’ll be recommending them to my dance mom friends!
Thanks Randa! 🙂
I love it when I come up with a clever solution to daily problems. The curls look grat! Glad you found a great fix!
Absolutely!
I would have killed for curls like that when I was younger. I have thin hair, and I could NEVER get the curls I wanted. Your daughter’s hair looks fantabulous!
Sam Jennifer, which explains the countless perms … sigh…
Her hair looks AWESOME! That is seriously so amazing. This makes me wish I had long hair.